
Painting Fantasy Houses
You can order a physical on our website here or buy the files to print one yourself through our MyMiniFactory https://www.myminifactory.com/users/Terrainiacs
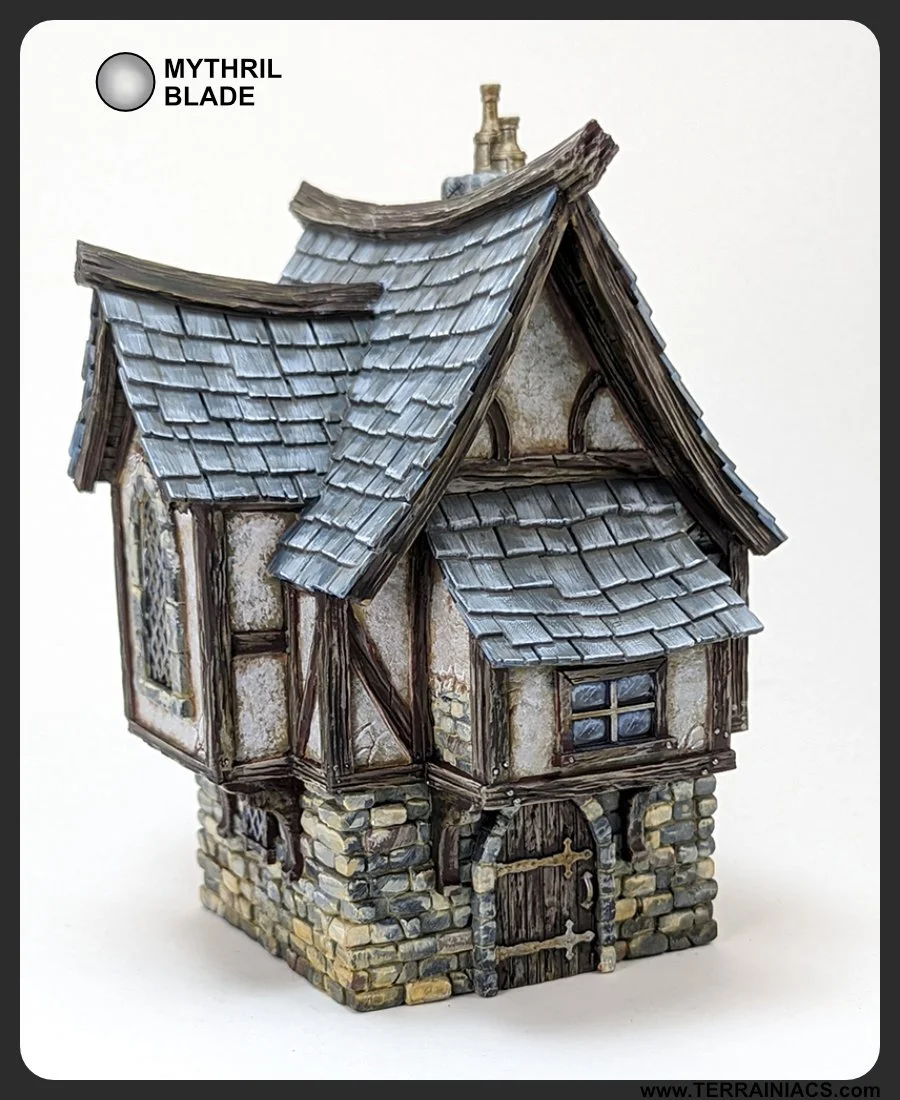
This tutorial was done with one of our house STLs printed in resin,
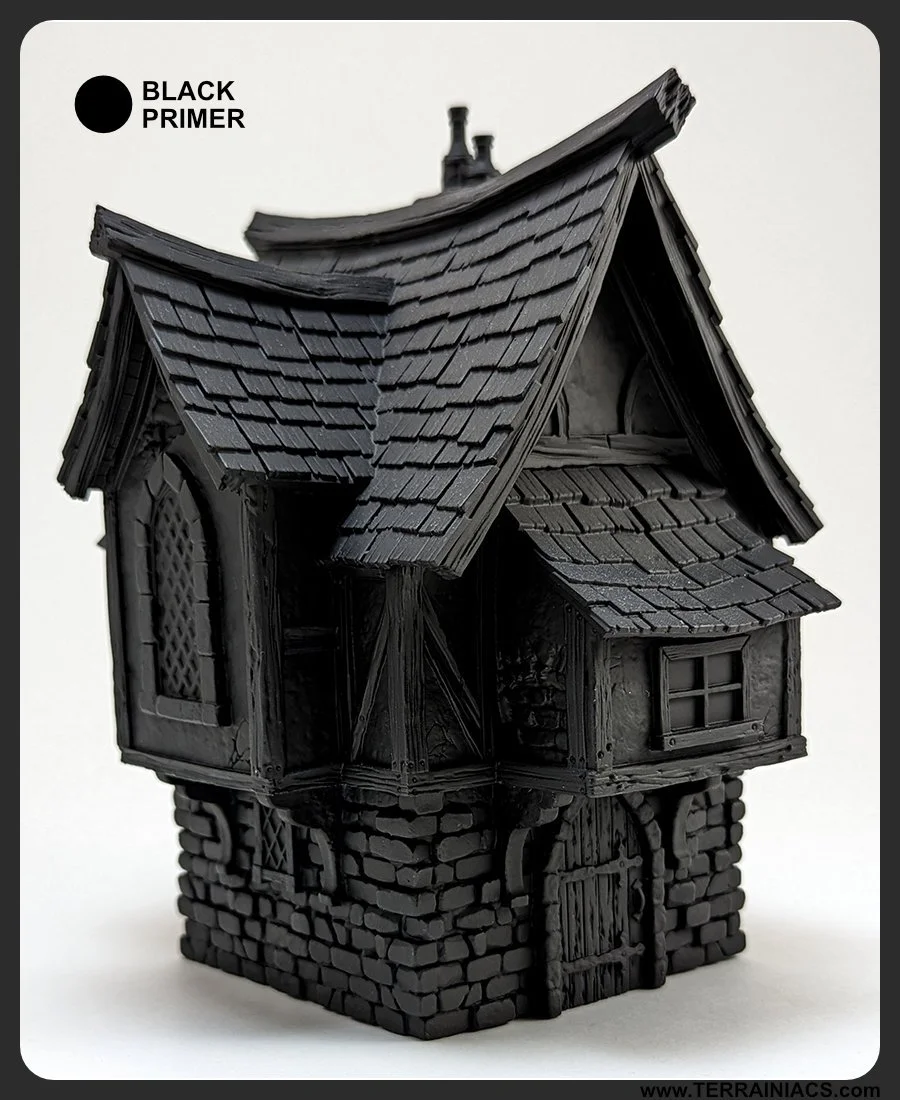
Step 1: Prime the house with black primer. Either from a can, or airbrush. For this I used an airbrush primer. Make sure you get all the little nooks and crannies. It may take a few coats from different angles.
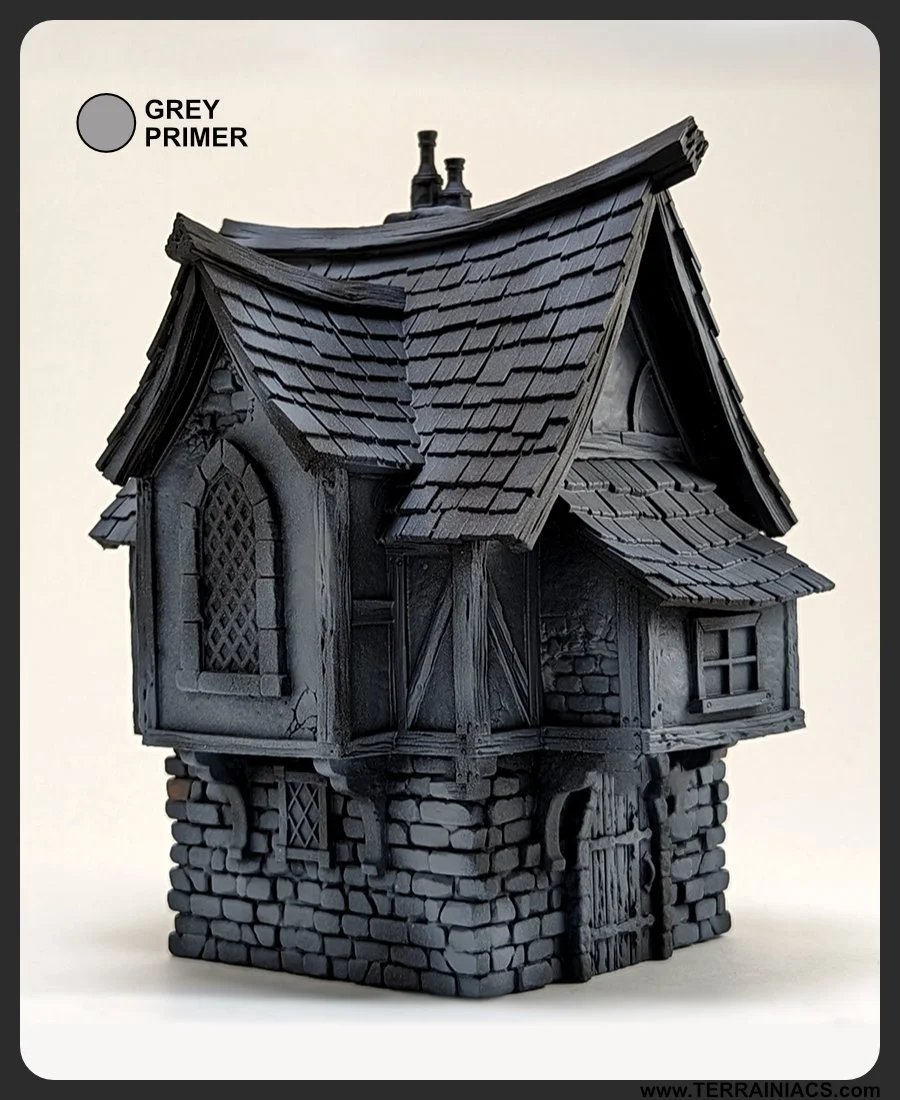
Step 2: Do an uneven zenithal coat with grey primer (or paint). This is going to give us some variation under the base coat to add interesting tones to our thinner base coats.
For out terrain and this tutorial we are using Two Thin Coats paints and Techlon Tiger Drybrushes


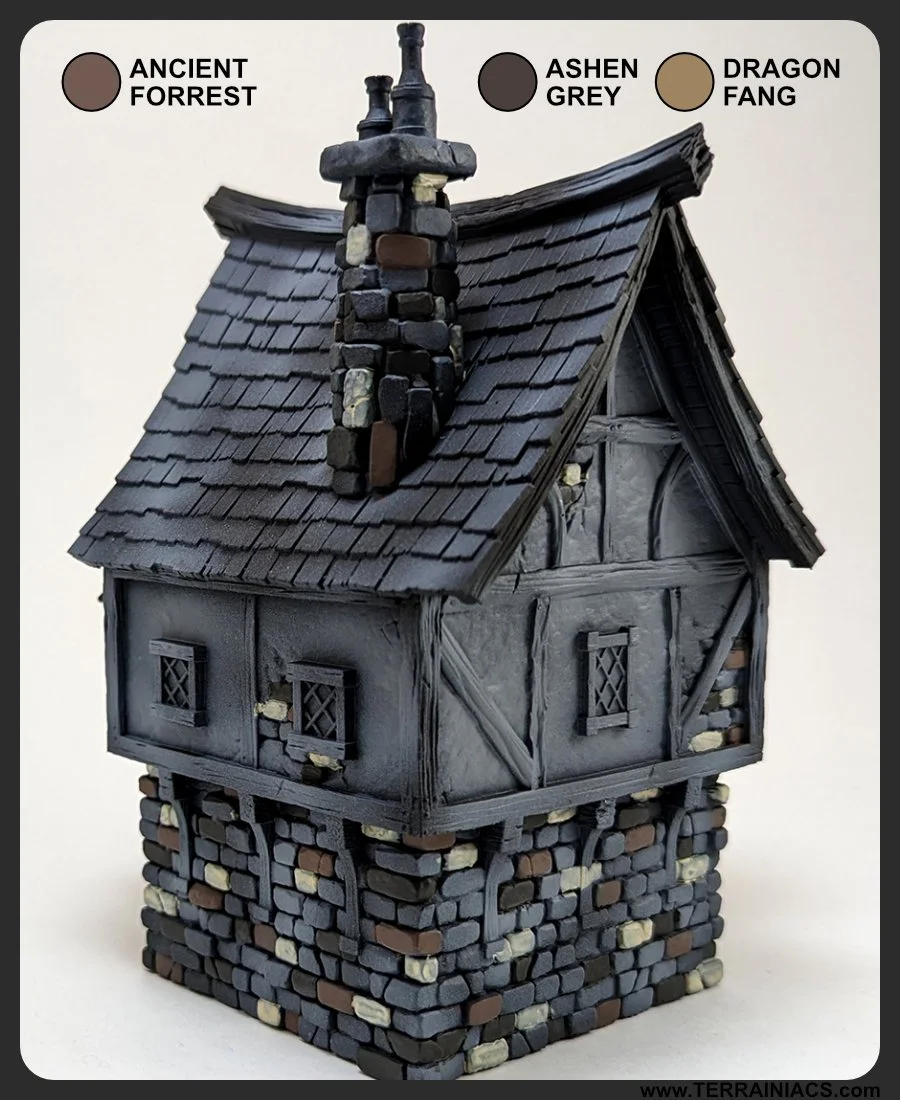
Step 3: In this step we are going to thin down all the colors we use. This will give us a splotchy uneven look making more interesting stones.
I used Ancient Forest, Ashen Grey, and Dragon fang. Don’t paint all the stones and make sure to space them out and keep it random.

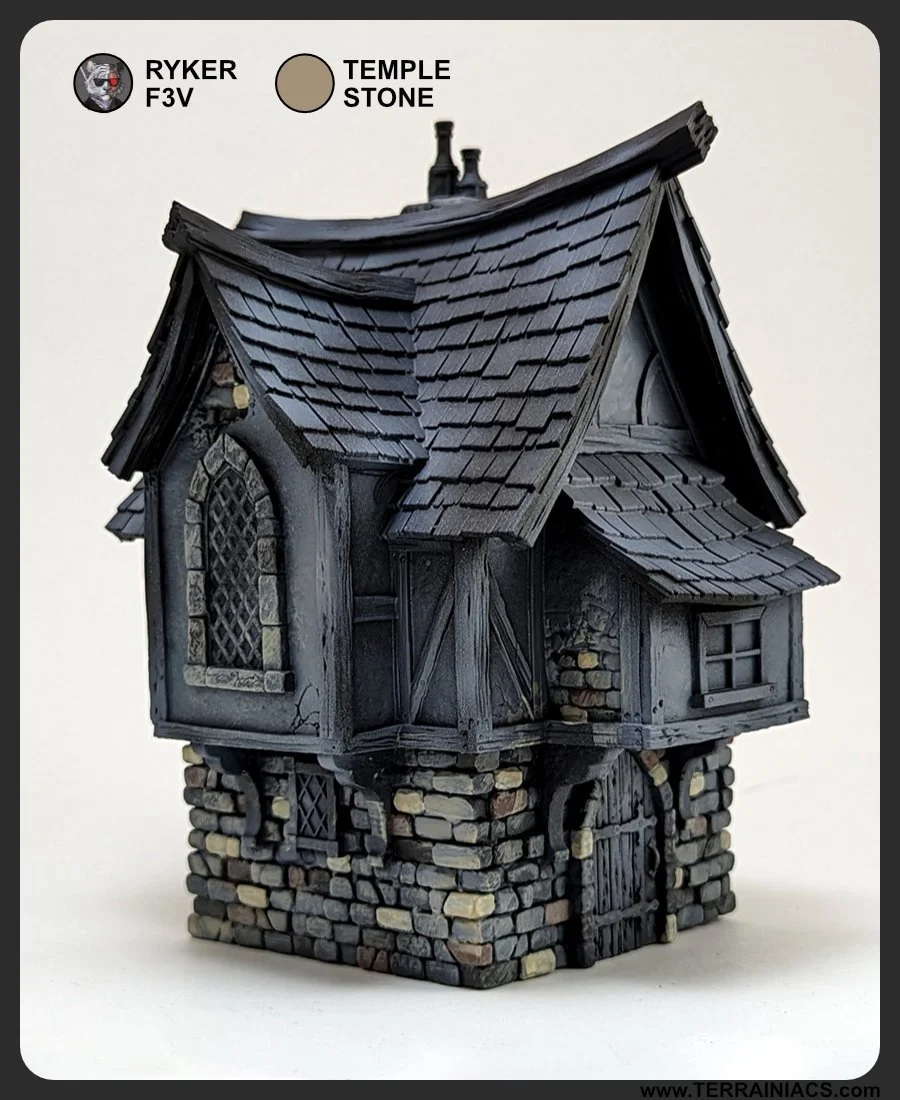
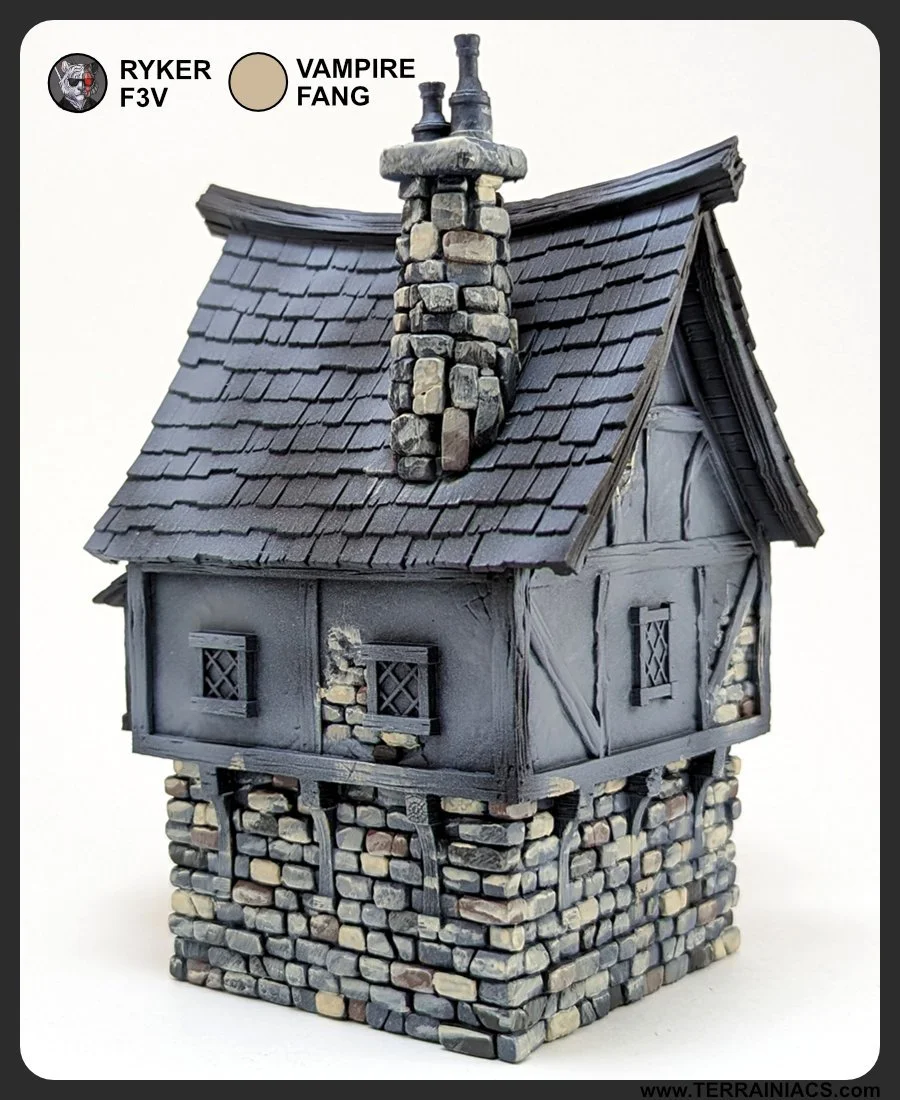
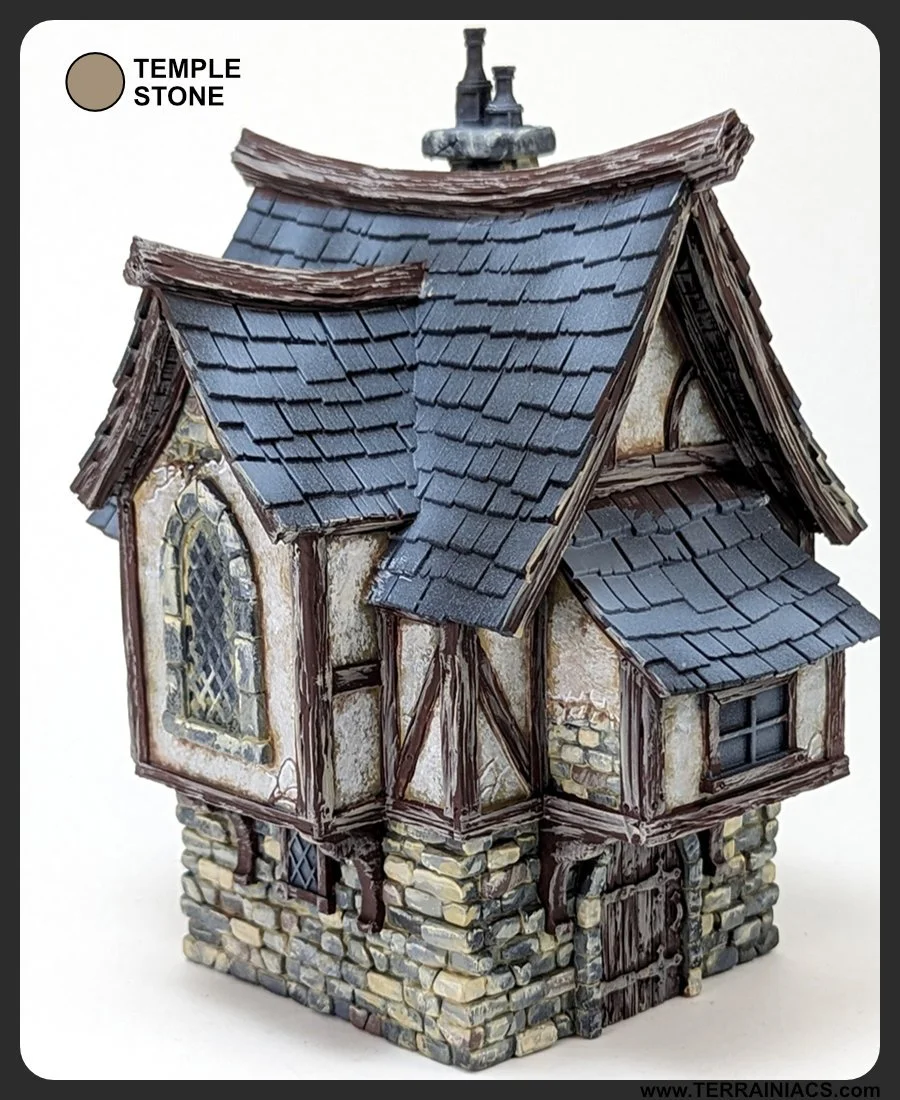
Step 4: Using a Ryker drybrush apply a drybrushed coat of Temple Stone.
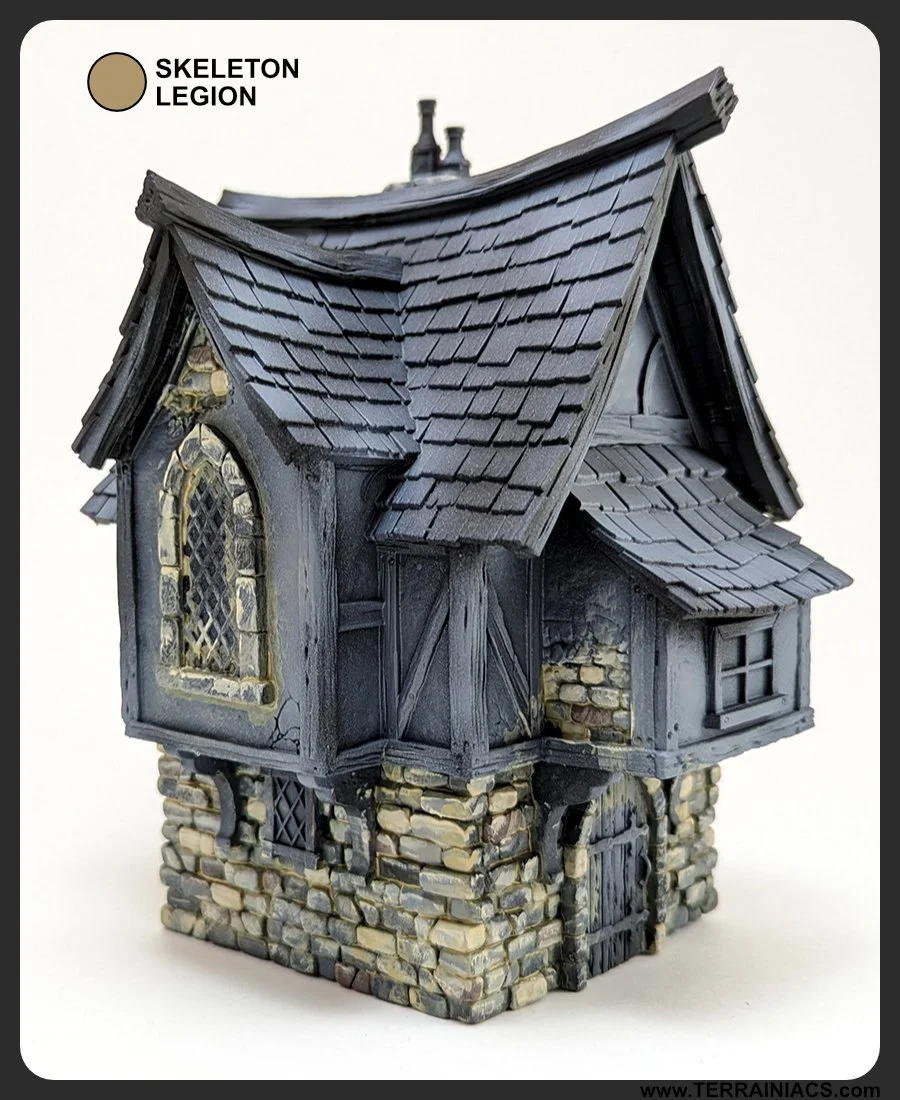
Step 5: Now we are going to fill in all the cracks to look like grout. (You can skip this step if you want a darker looking house.) Working in sections so the paint does not dry use a very watered down Skeleton Legion wash all the stone. Then with a damp paper towel wipe off all the paint on the surface leaving it just in the cracks.

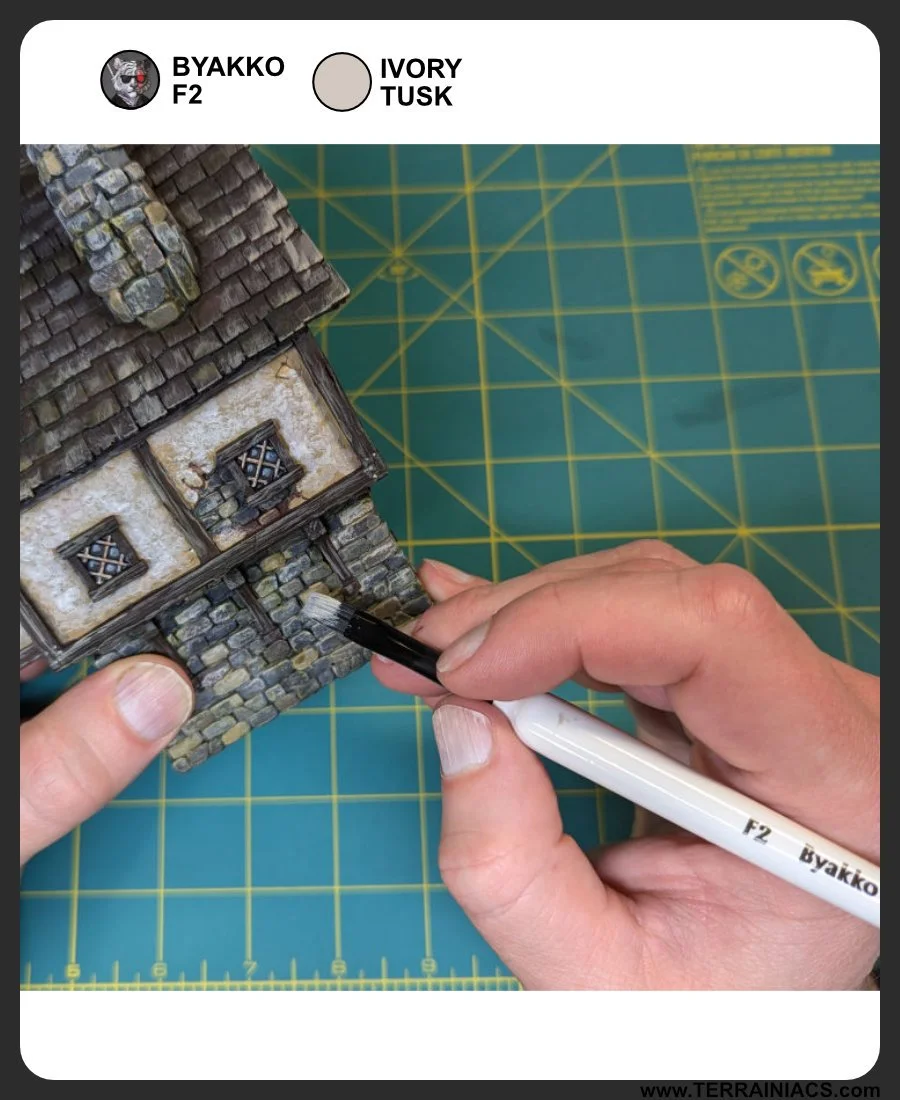
Step 5: Using the Byakko drybrush take Ivory Tusk and lightly drybrush over the stones to add some texture.

Step 6: Next up we are going to paint the stucco. Base coat all the stucco with a watered down Dragon Fang. We don’t need even coverage as we want some variation in the stucco coloring.


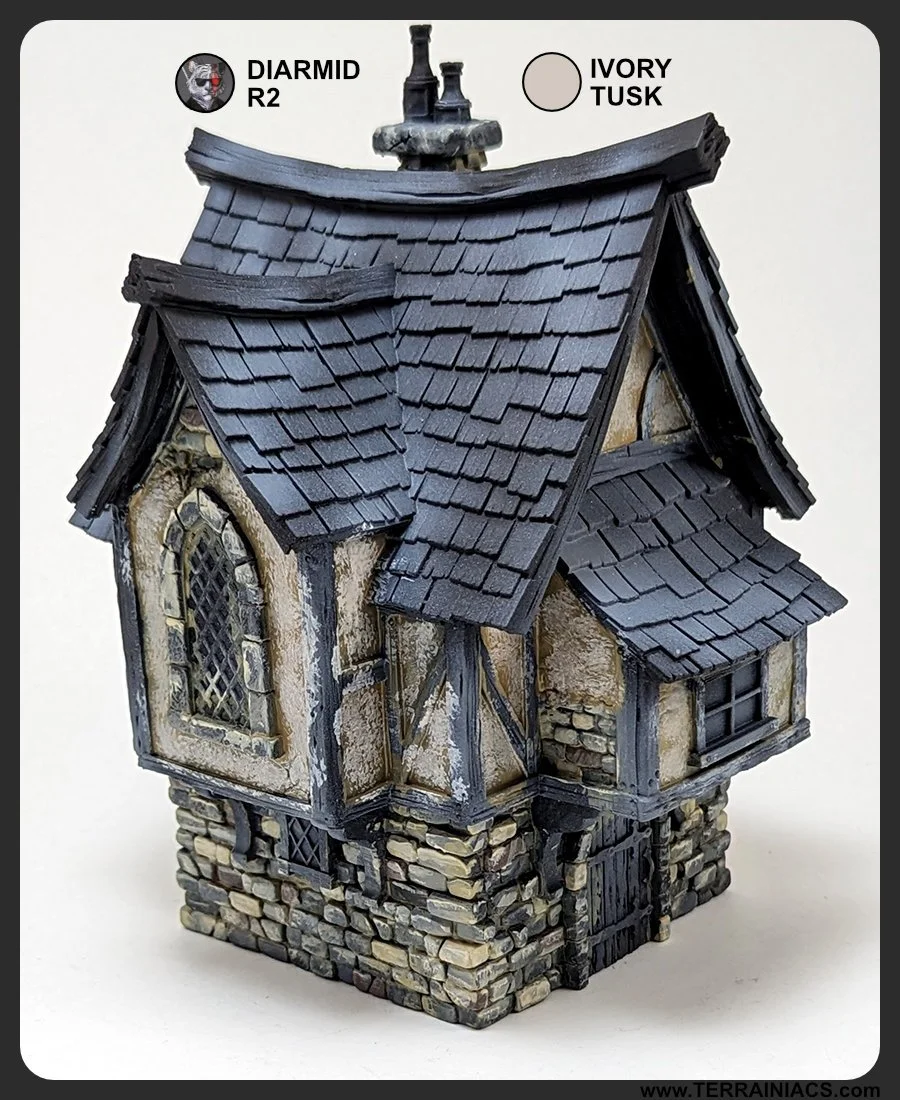
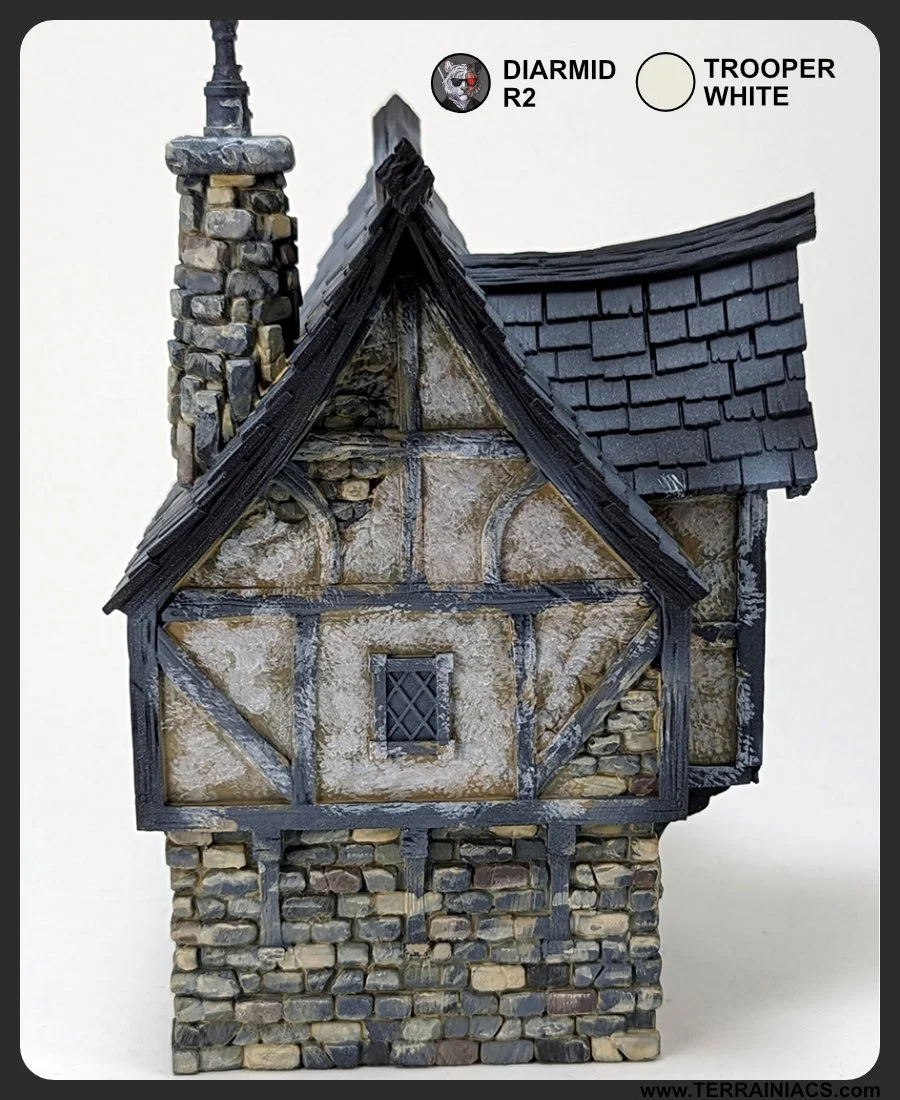
Step 7: Using the Diarmid drybrush we are going to stipple Ivory Tusk over all the stucco focusing more on the center of each panel leaving more of the base coat around the edges.
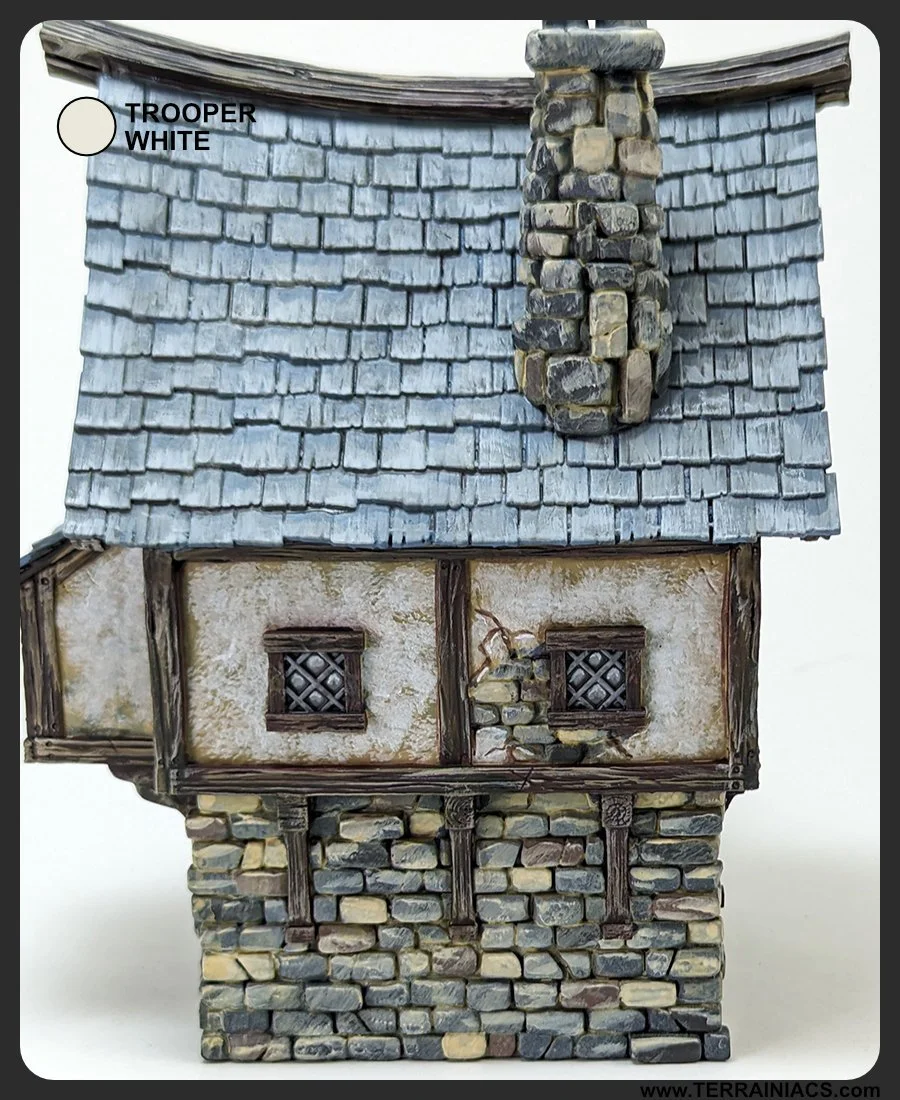
Step 8: Using the Diarmid drybrush we are going to stipple Trooper White over all the stucco focusing even more on the center of each panel leaving more of the base coats around the edges.
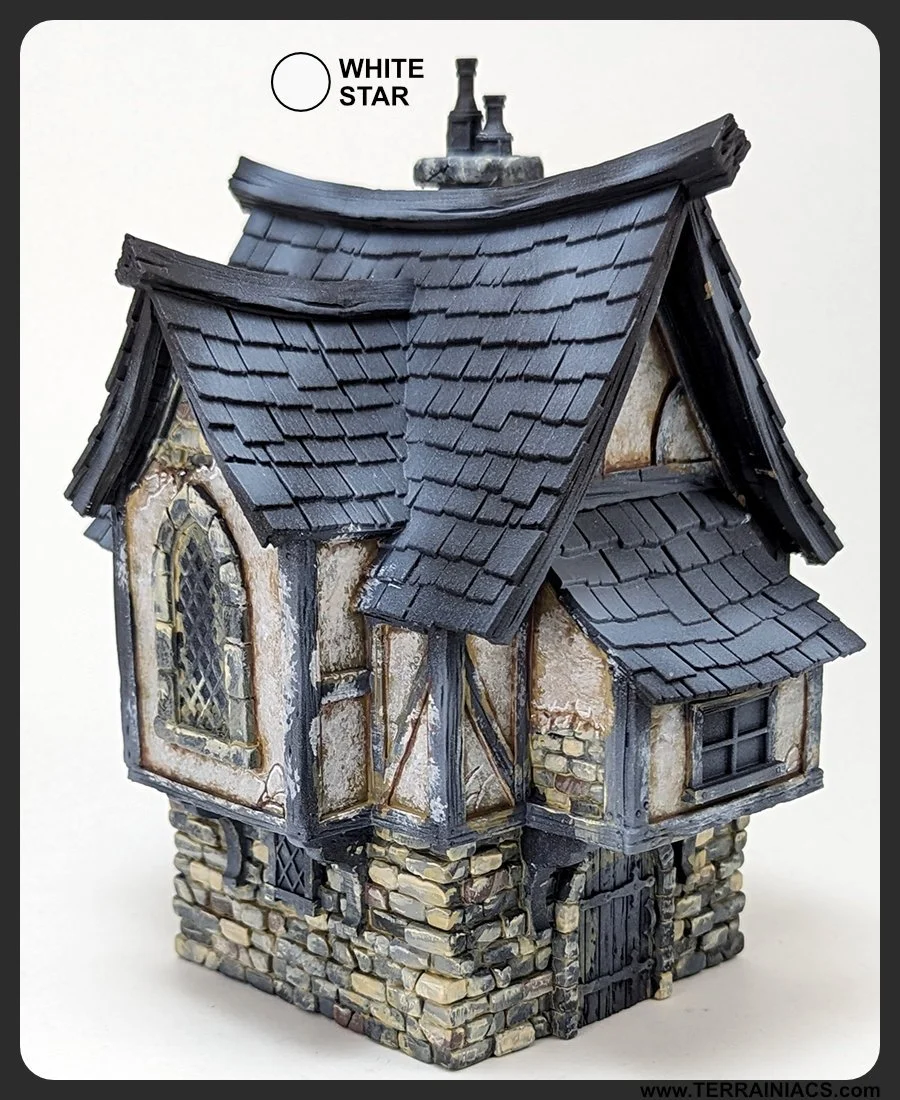
Step 9: Using White Star paint the edges of the cracks on the stucco.
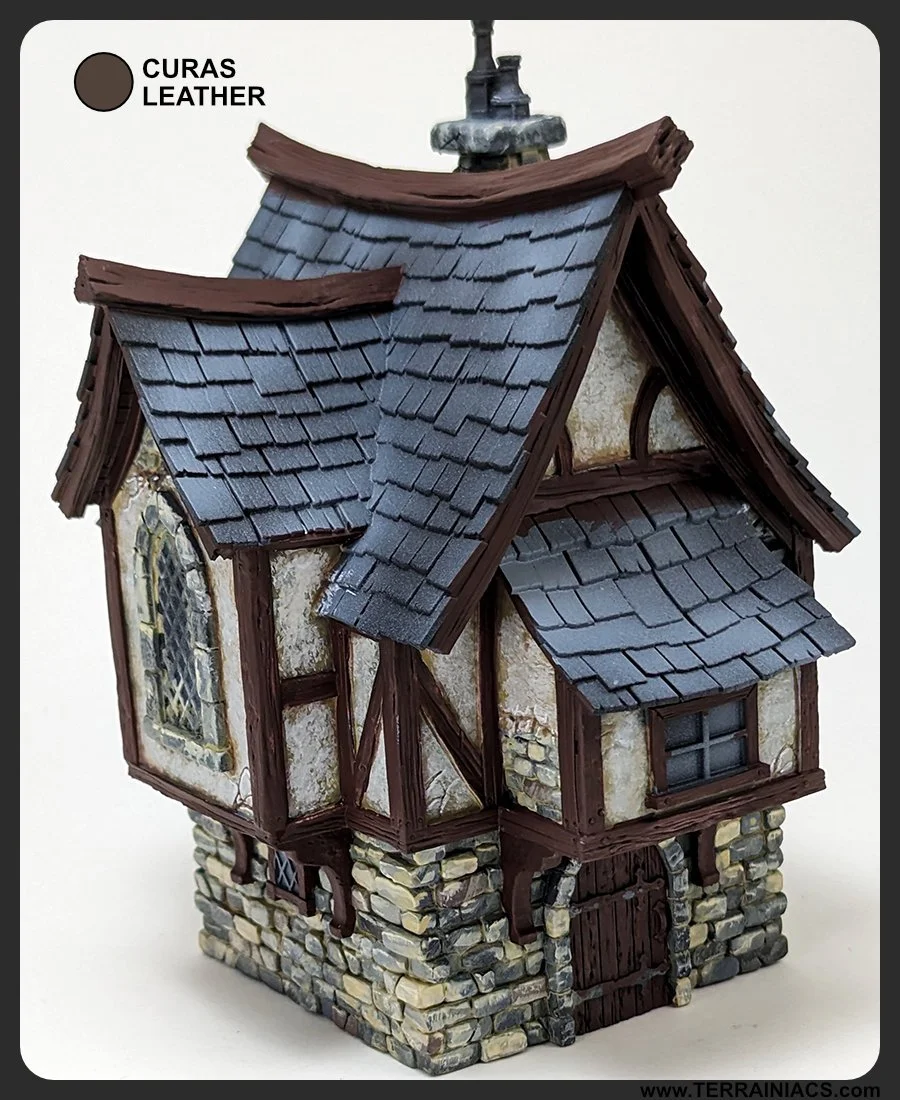
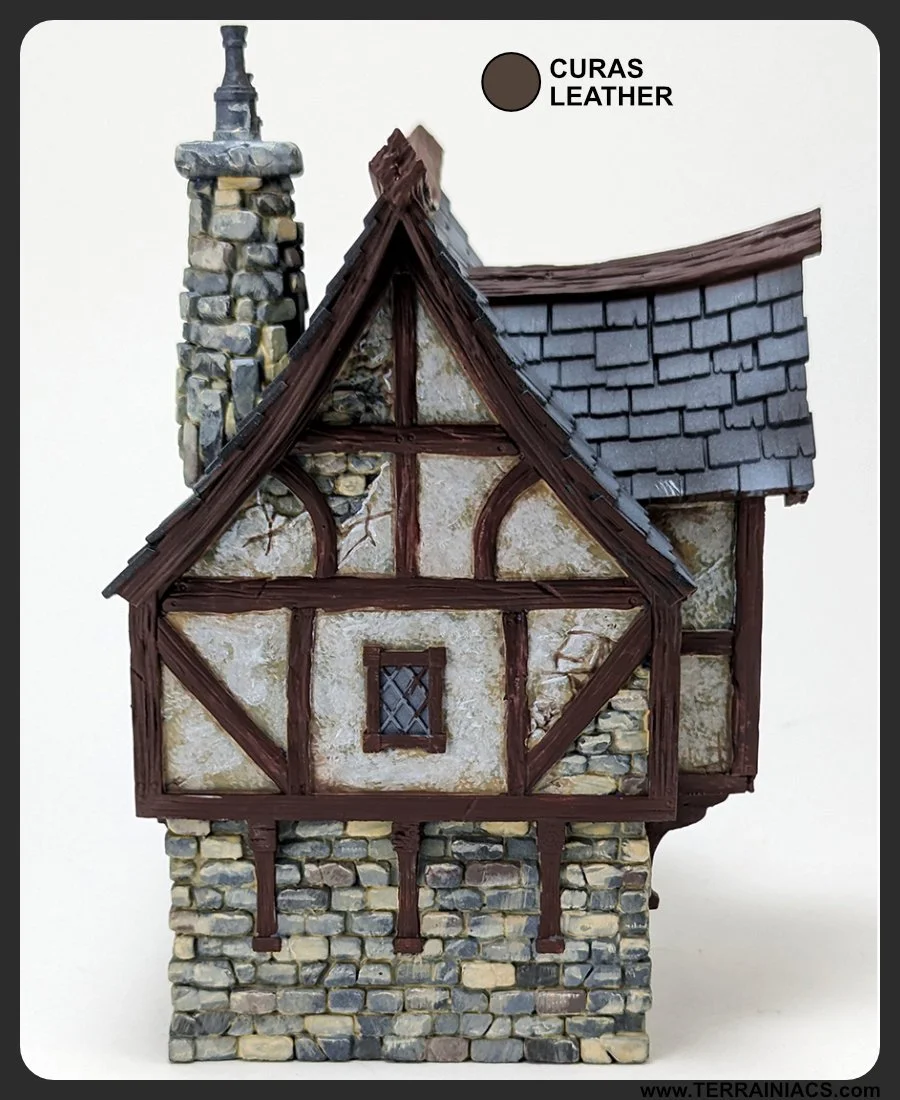
Step 10: Next up is the wood trim. Using a watered down Curas Leather and apply to the wood trim. Leave a little of the grey/black printer showing through for extra texture to the wood.
Step 11: Using the Byakko drybrush take Temple Stone and drybrush the wood grain.

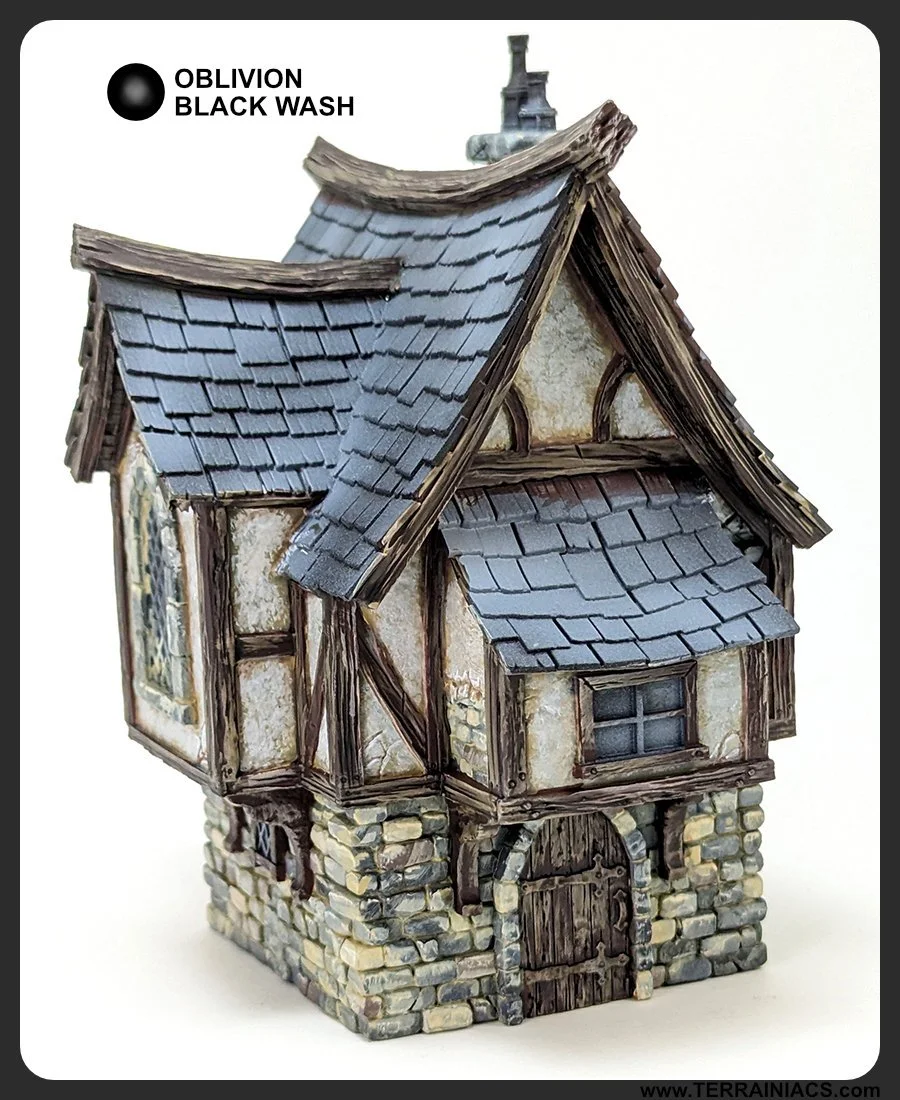
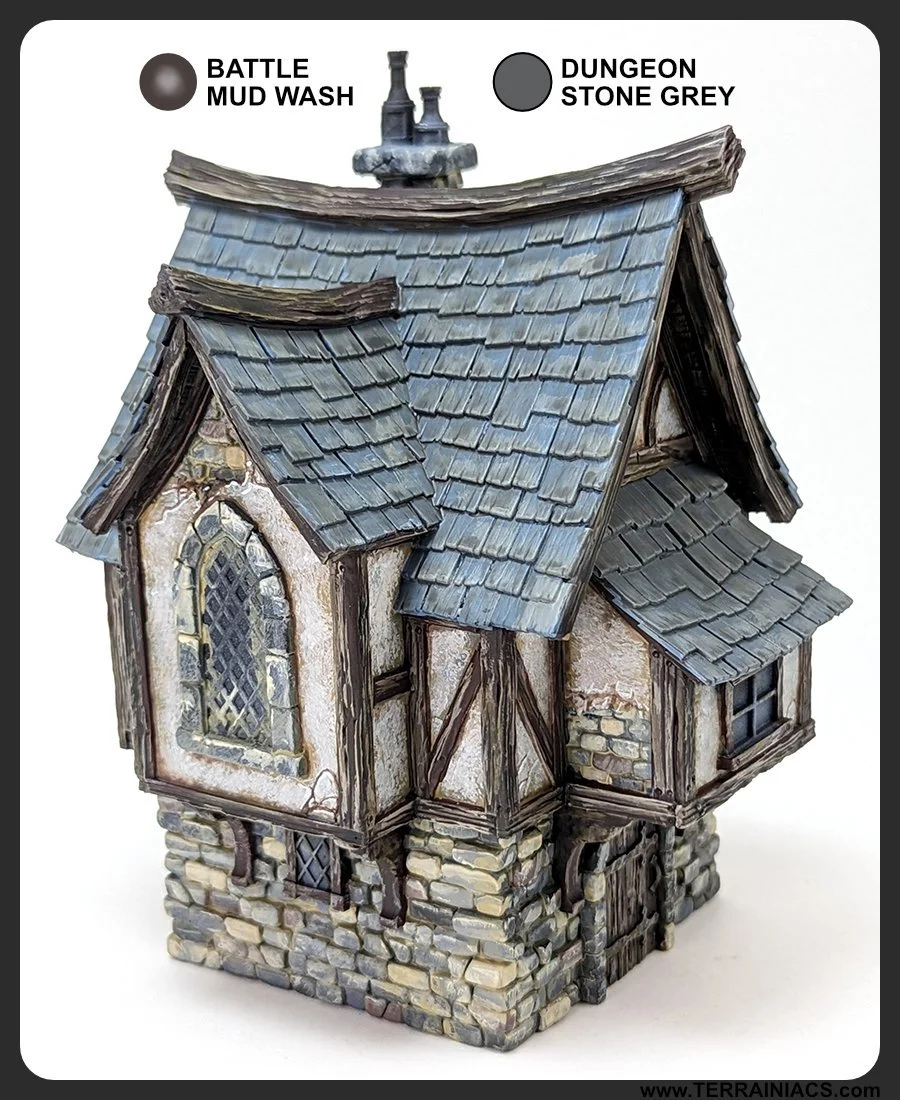
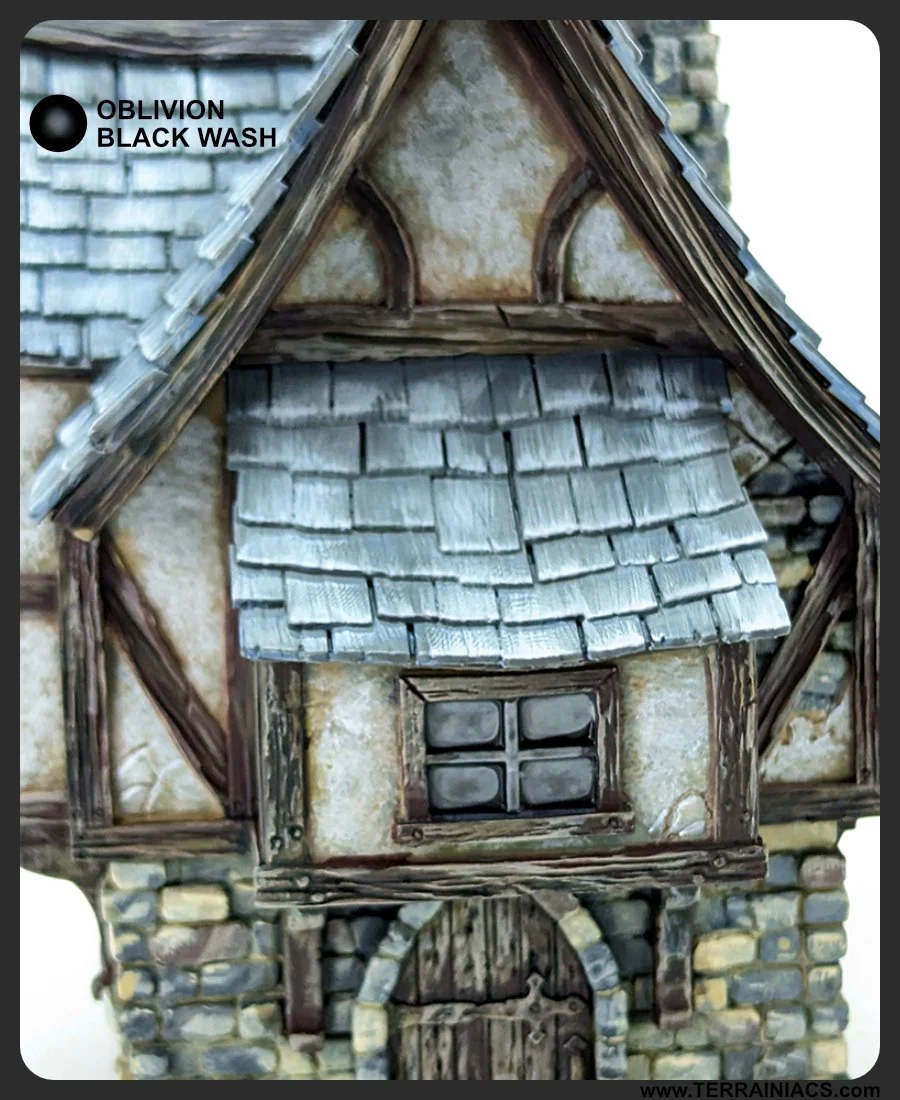
Step 12: Wash all the wood with either Oblivion Black Wash or Battle Mud Wash depending on how dark you want the wood.

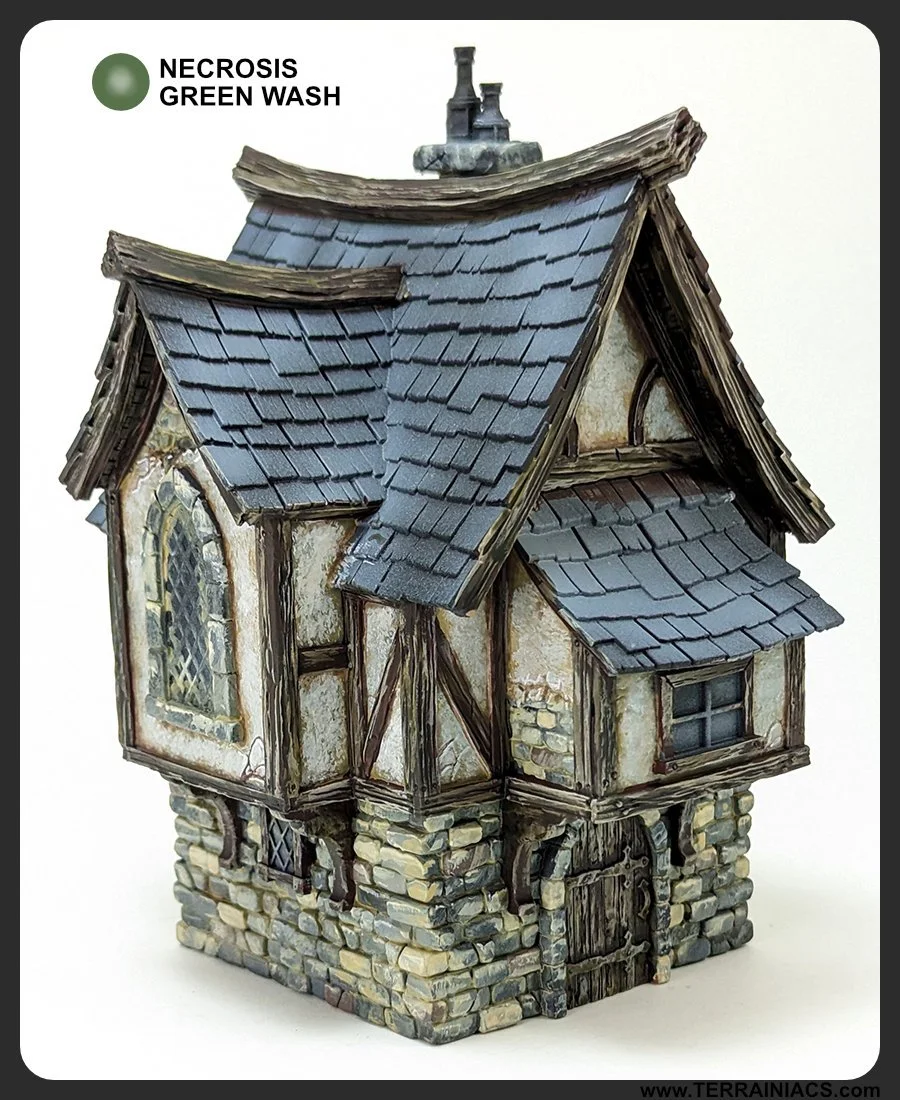
Step 13: Wash all the wood with Necrosis Green Wash. This adds some interest to an otherwise monotone brown wood. After that go back and lightly drybrush Temple Stone on the edges of the wood where desired.

Step 14: Using a watered down Wolf Grey apply a splotchy base coat.

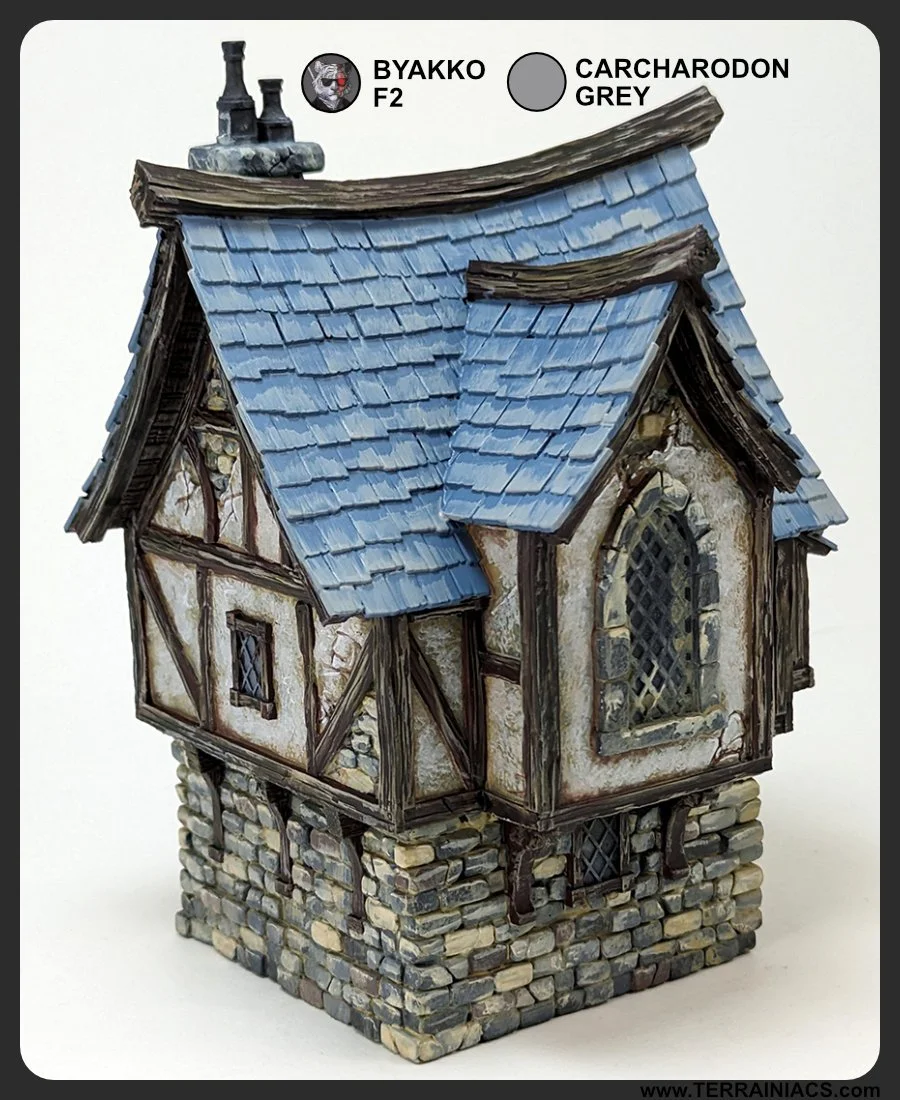
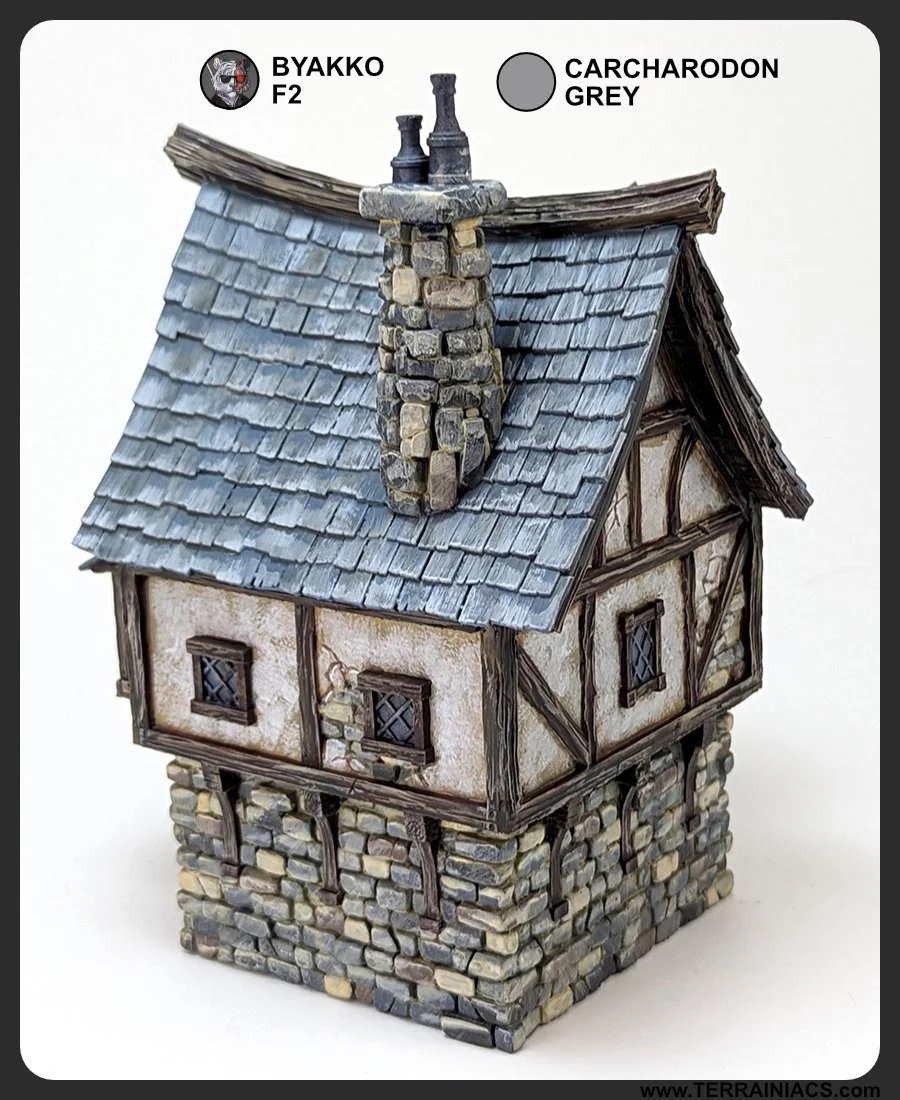
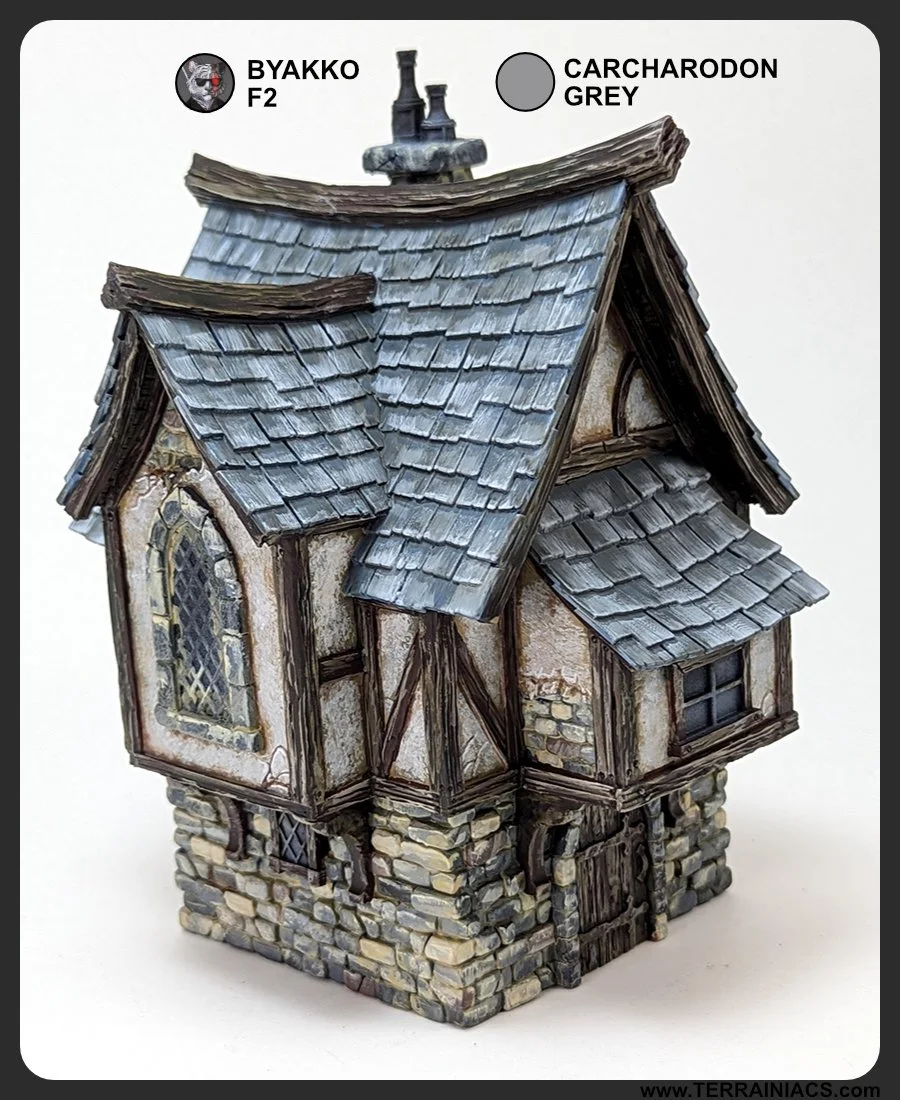
Step 15: Using the Byakko drybrush highlight the shingles with Carcharodon Grey making streaks starting at the bottom of a shingle and moving up.
Step 16: Wash the singles with a mix of Battle Mud Wash with a tiny bit of Dungeon Stone Grey mixed in to lighten the mixture.
Step 17: Go back and highlight the shingles with Carcharodon Grey streaking up from the bottom of the shingle to the top.
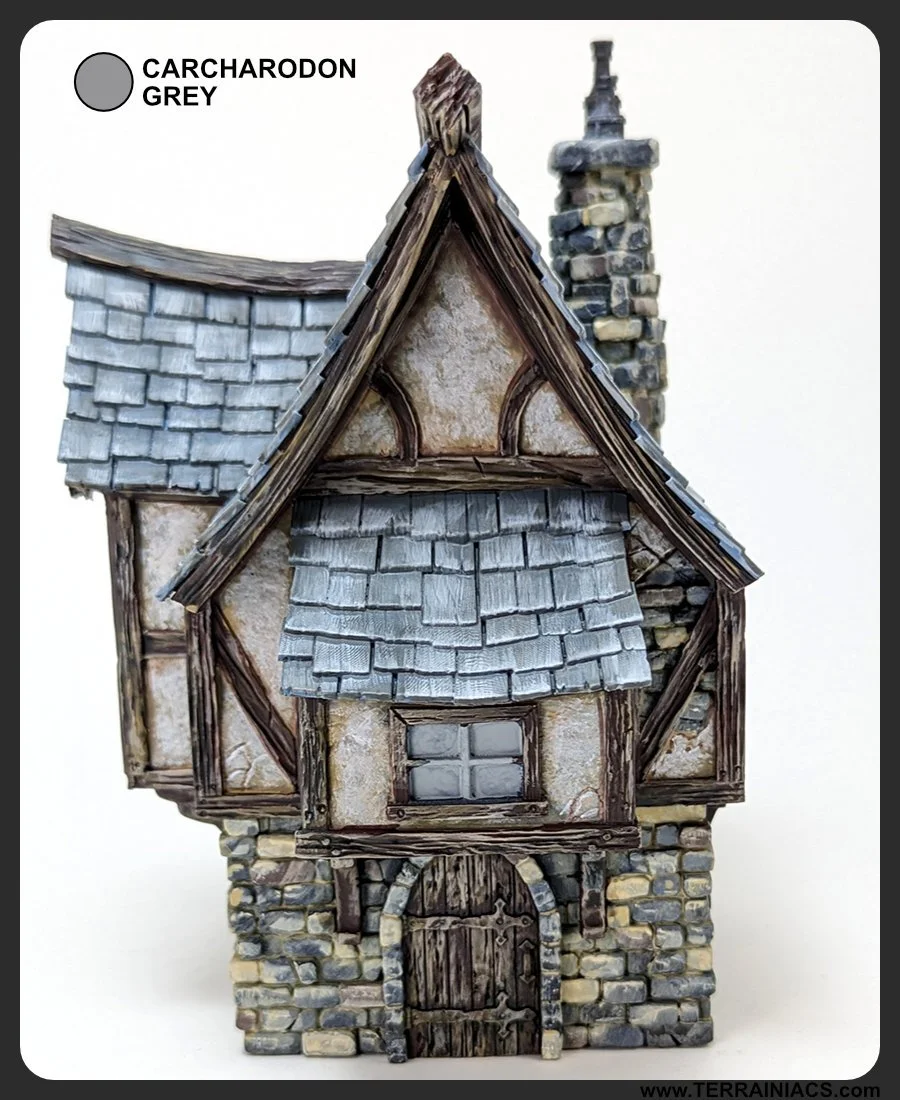
Step 18: Next mix a little white with Carcharodon Grey and highlight the edges of the shingles. After that shade between the shingles with Eidolon Grey.
Step 19: Next up are the windows. Base coat them Carcharodon Grey.
Step 20: Wash windows with Oblivion Black Wash
Step 21: Highlight to top portion of the windows with Carcharodon Grey.


Step 22: Highlight each window with Trooper White. Mostly around the top of each pane with some added reflection streaks.

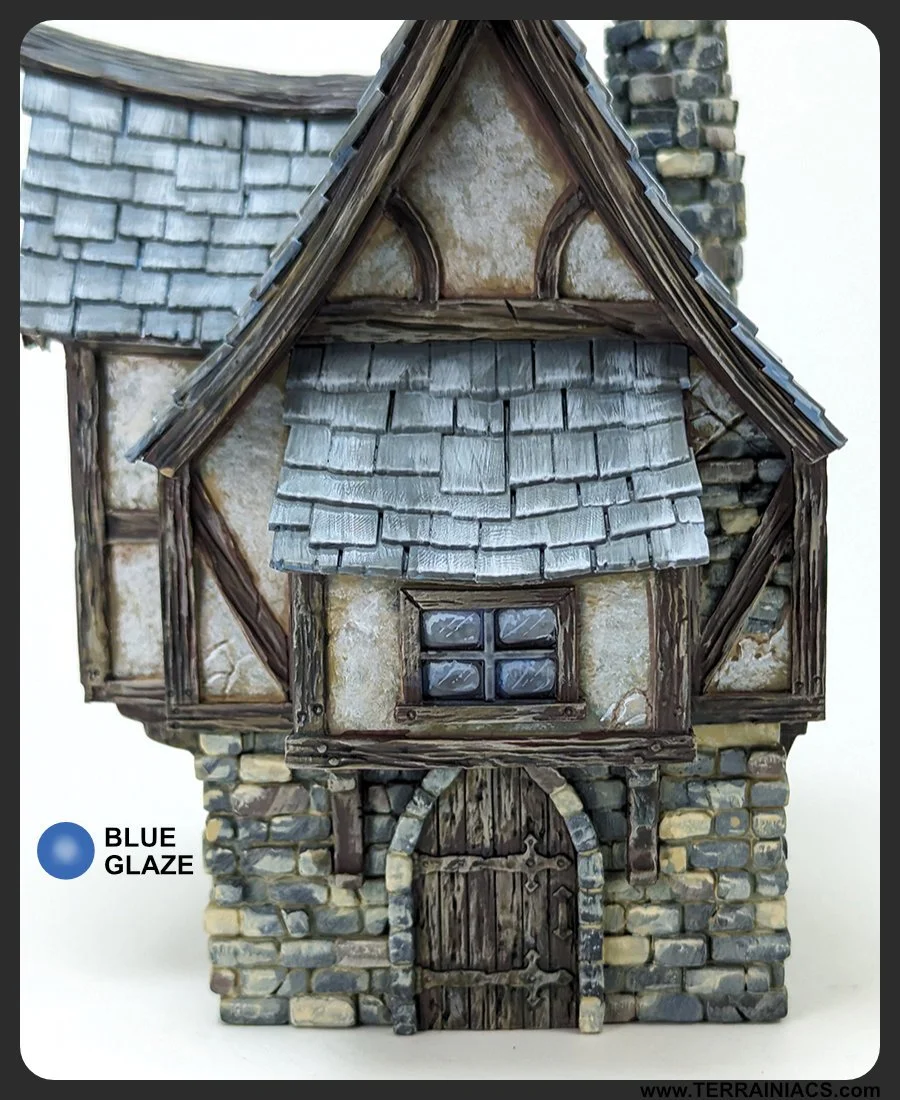
Step 23: Apply a light Tempest Blue Wash to each window pane.
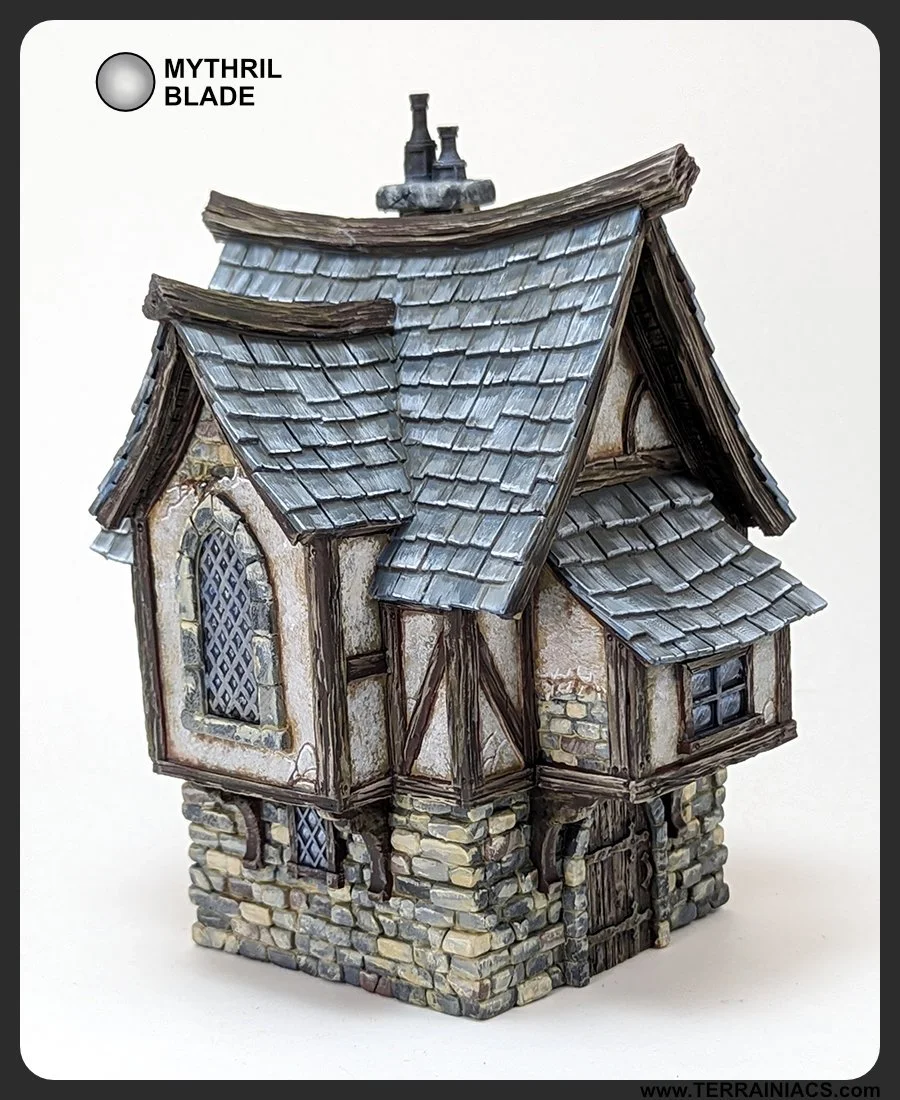
Step 24: Lastly Paint the metal either Mythril Blade or Sir Coats Silver. Wash with Oblivion Black. If you want to add a little light rust, wash with Flesh Wash.

Step 25: Enjoy your painted terrain and play some games!