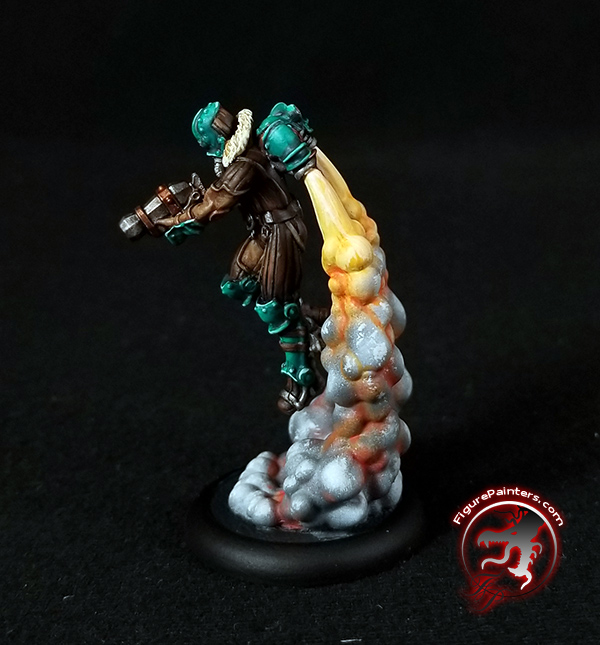
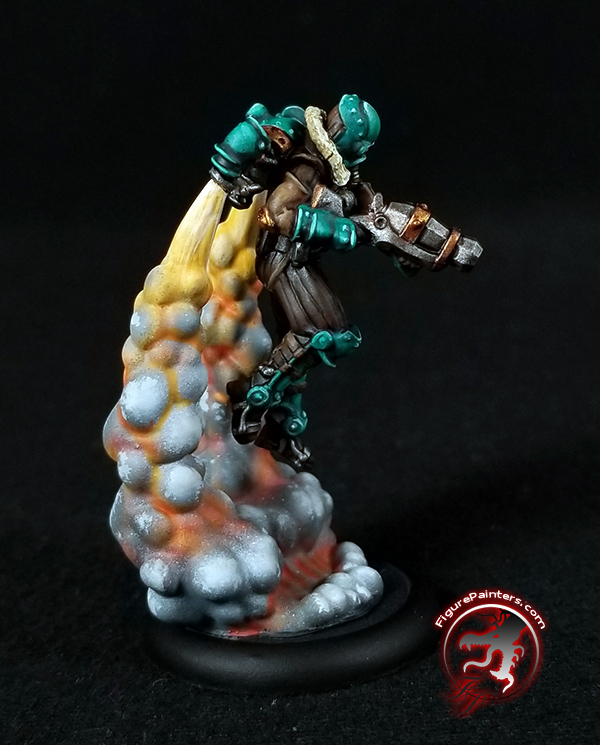
Painting Rocket Pack Smoke Trails
 The following is a tutorial on how I painted the Figure Painters rocket pack smoke trails that are compatible with Privateer Press's Crucible Guard Rocketmen.
You can find the smoke trails in the Terrainiacs store.
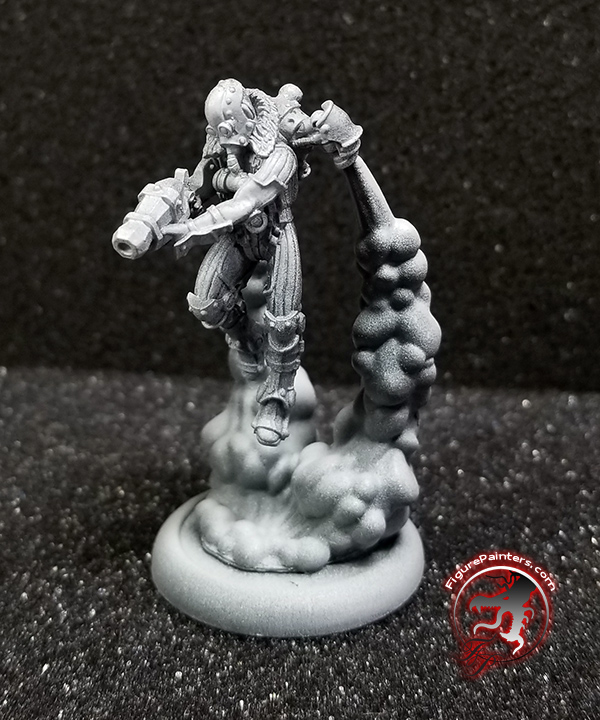
Starting with a Rocketman, you want to fill in the location where the clear stand used to attach. Using green stuff putty and the tip of a mechanical pencil fill in the divot and smooth it out. Then press the end of the mechanical pencil into it. This will give you a little button which helps keep the back from being too boring.


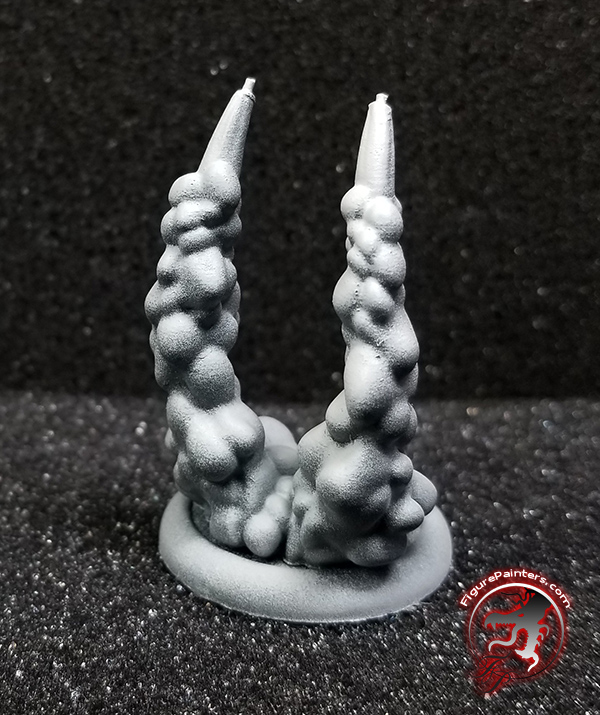
Take a smoke trail that has been glued to a base and drill one 1/32" hole at the top each smoke jet for the brass rod that comes in the kit. This is not necessary, but it will help keep them attached vs a glued butt joint. If you do not pin, I would recomend sanding the top flat to help with gluing. You may need to clean up some mold lines on them.


Also drill a hole in each of the rocket pack nozzles for the pins in the smoke. Test fit the rods. Cut them down if necessary. You also may need to bend them slightly to get the angle right going into the rocket pack. The following picture just has them lightly set in.

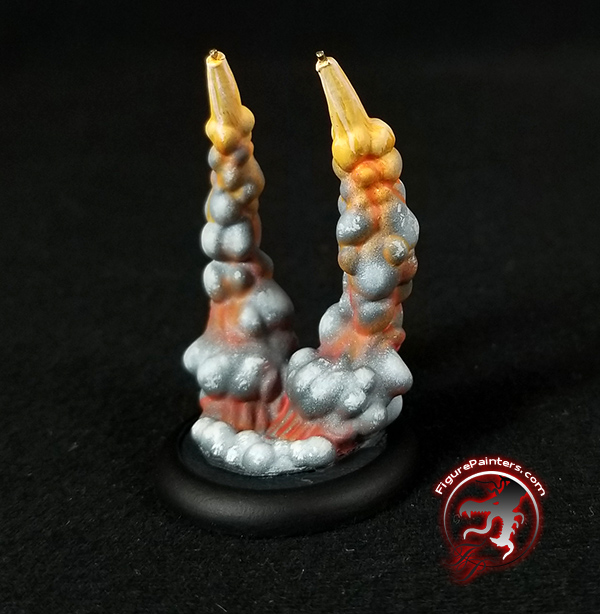
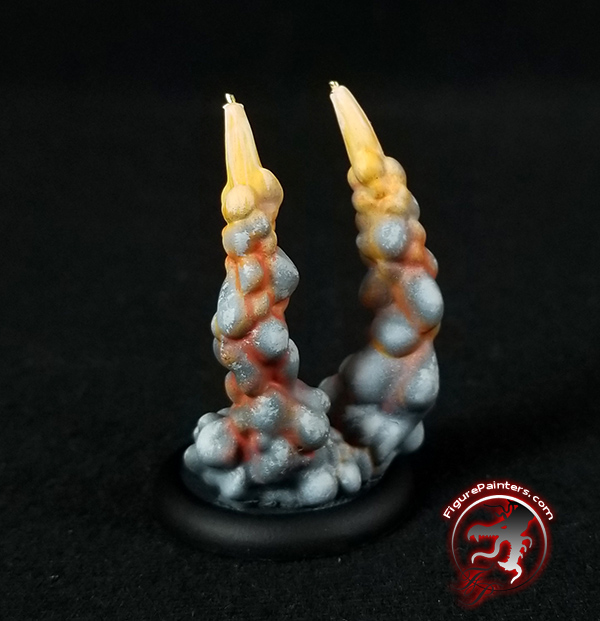
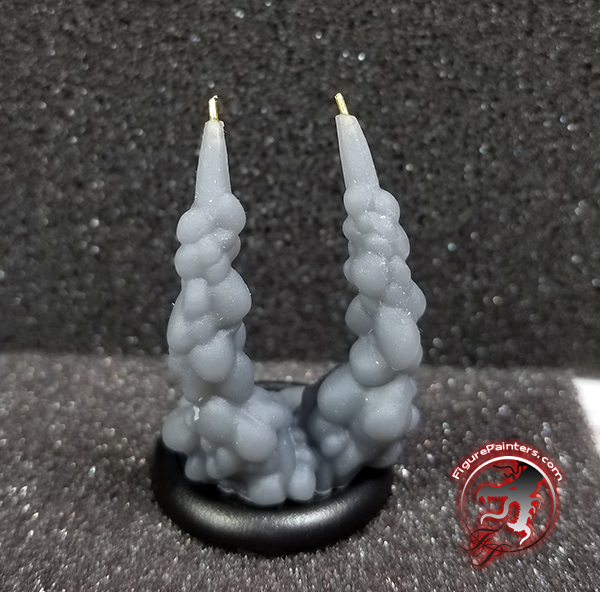
Next up is priming the smoke. I primed it grey, then did a zeinithal prime with white so you can see the smoke billows a little better.


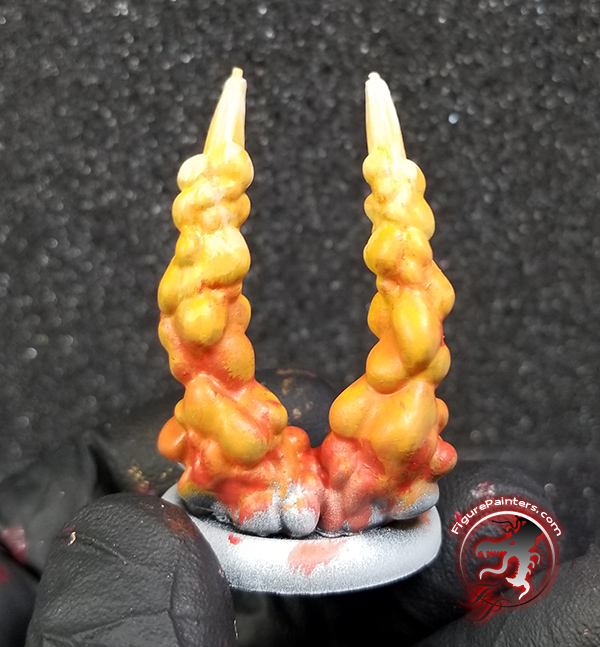
First base color is Two Thin Coats Orange Flame. You can paint the entire smoke if you want.

Mixing in a little bit of Two Thin Coats Ivory Tusk, shad the upper part to start building a lighter transition up to the top.

Mixing in even more Ivory Tusk, add streaks coming from the top downwards.

Now towards the bottom we are going to add Two Thin Coats Fanatic Orange. As you work your way up with it, limit it more to the recesses of the plumes.

Now mixing Two Thin Coats Fanatic Orange with Two Thin Coats Demon Red, shade the bottom, and a little further up the smoke, staying to the undersides of the billows.

Taking Two Thin Coats Wizard Grey and and airbrush, start shading the smoke trail. You will want more grey down towards the bottom and also try to leave some orange showing through in the recesses.


Next, use a mixture of Wizard Grey with Two Thin Coats Carcharodon Grey and apply highlights with the airbrush again.
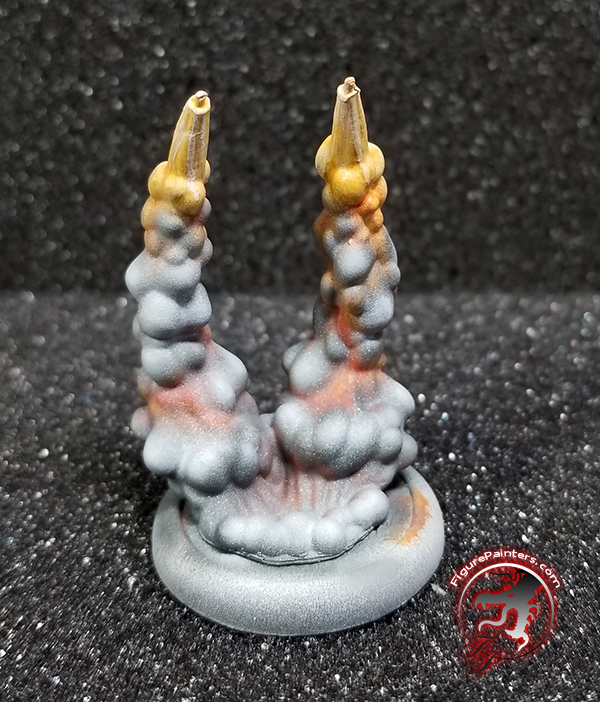

Now apply straight Carcharodon Grey until you are happy with the the highlighting.

Taking a brush and adding some Ivory Tusk to Carcharodon Grey, stipple on a little texture on the lightest grey parts of the billows.


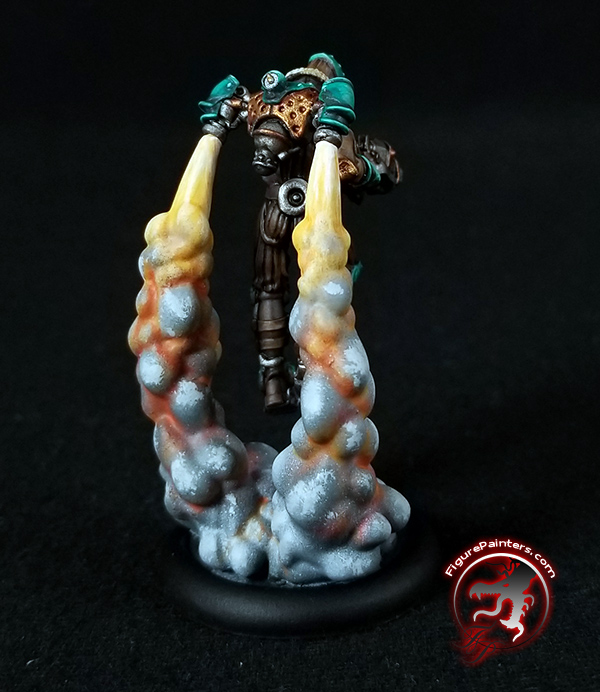
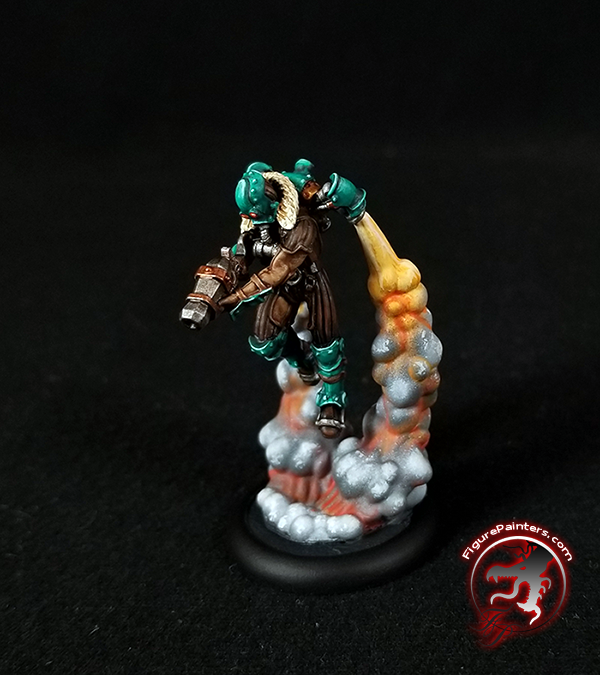
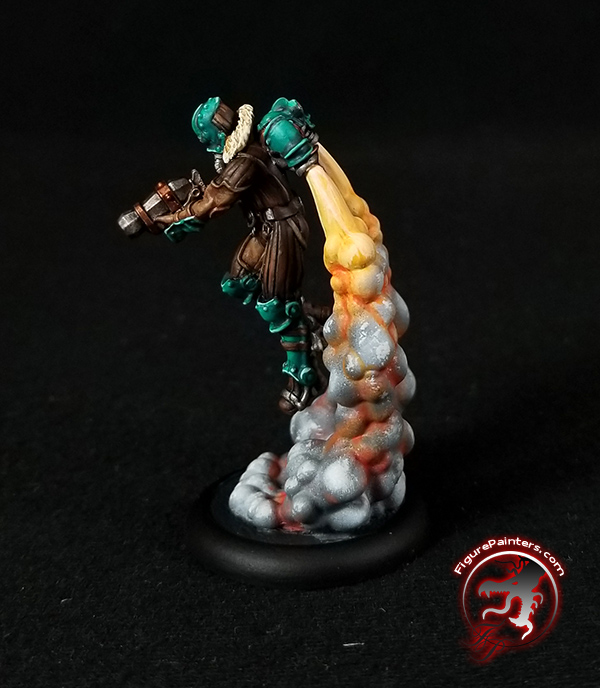
Going back with Fanatic Orange and a little Demon Red base where needed, bring back a little more glow in the cracks. Then finish off your base, paint your Rocketman and enjoy!
Hope this helps out, and if you have any questions always feel free to ask.
All of these colors are currently available for sale, conveniently, on our webstore here:
https://terrainiacs.com/collections/two-thin-coats